Bringing together industry, community and expertise to shed light on the events of a dark night in 1918
Over half the Earth’s surface is hidden from human eyes, and for half of a day on average our immediate surroundings are obscured by the setting of the sun and the passing of the night. Science and technology have allowed us to see both in darkness and below the waves, shedding light both literally and metaphorically on human activities. Thanks to a combination of industry-led survey data, expertise in wreck assessment, and enthusiasm and interest from a community group, it has been possible to lift up the seabed of the Firth of Forth to investigate the wrecks of two submarines that sank on a cold January night over 100 years ago.
The wrecks came to be there due to a military training disaster known as the Battle of May Island. This event was not actually a battle but in fact a series of collisions, mishaps and mistakes within a combined fleet of surface ships and submarines heading out from the naval anchorage in the Inner Forth around Rosyth to an exercise in the North Sea. It led to the tragic death of 100 submariners, something that was covered up until well after the end of the war.

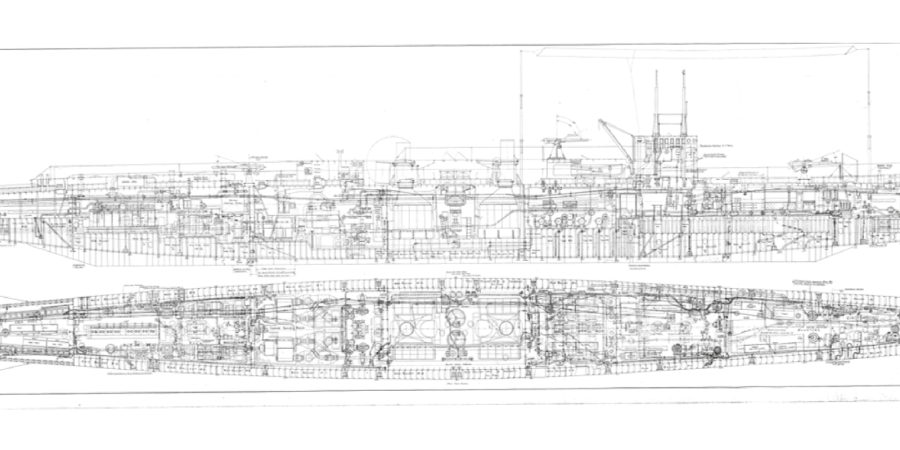
Above: K-Class submarine plan (Copyright National Maritime Museum)
During the course of the night of 31st January 1918 the fleet, made up of two flotillas of K-Class submarines (the largest and fastest submarines in the Royal Navy, but also plagued with issues due to their length and steam propulsion), their attendant cruisers, a squadron of battlecruisers, a squadron of battleships and their attending destroyers, would try to navigate their way out of the Forth in total darkness, with only small lights showing their location to the vessel in line behind. The submarines of the leading 13th flotilla encountered small vessels crossing their path and took evasive action, with K14 having steering issues which led to K22 accidentally ramming K14, causing damage to both submarines. The remains of the flotilla and their attending cruiser HMS Ithuriel continued eastward until it was clear what had happened, when they decided to turn back to assist their comrades.
A communication breakdown led to none of this being radioed to other ships, with the result that the following battlecruisers steamed past the stricken submarines (with a minor second collision) and on out into the North Sea. The 12th submarine flotilla of four K-Boats avoided the two damaged submarines but then encountered the returning vessels of the 13th flotilla. In the darkness the attending cruiser of the 12th flotilla, HMS Fearless, collided at near full speed with K17 coming in the opposite direction. As K17 began to sink, the crew abandoned ship and the submarines following HMS Fearless began to take avoiding actions. During the confusion K4, which had been following HMS Fearless, was rammed by K6, nearly cutting K4 in half. The remains of K4 sank very quickly. No survivors were recovered. To add further tragedy the crew of K17, having successfully avoided going down with that submarine as it sank, were run down by the escorting destroyers of the battleship squadron as they swept past the chaos. Only 8 of the 57 strong crew were recovered, one of whom died soon after.
One of these survivors was Fred Bown. Born in Dorset in 1886, Fred joined the Royal Navy aged 15 in 1902 and volunteered for the submarine service in 1912. His career in submarines started in the D class under the soon to be famous skipper Max Horton. When Horton took over E-9, Fred went with him and so spent 3 years in the Baltic as part of a flotilla of submarines sent to assist the Russians. He received the Russian George Cross and George Medal before returning to Britain via Murmansk in August 1917. Following this he was posted to the K-Class, with his service log noting “Served in K17 from August 1917 until sunk 31/1/18." Fred continued in the submarine service until 1925 and in the navy until 1928. He finally left the Fleet Reserve in 1939 and joined the Civil Defence Force for the duration of World War Two. He died at the age of 75 in 1962.

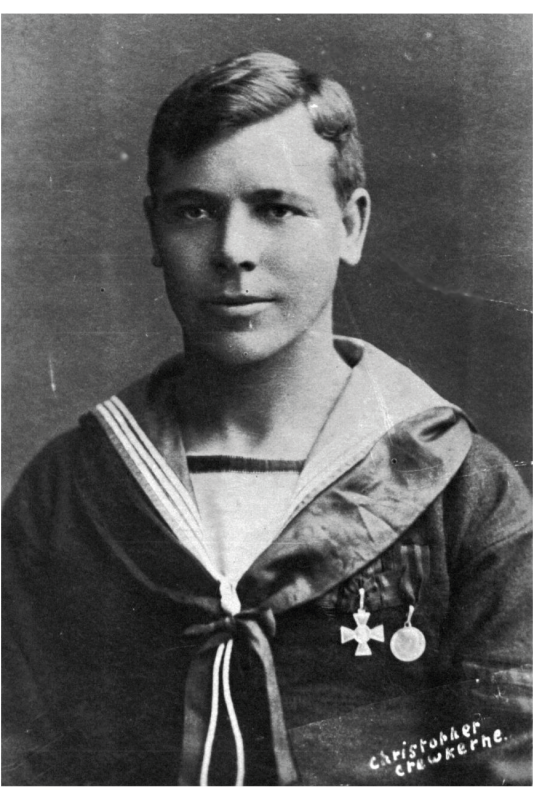

Above: Images of Fred Bown (Copyright Fred Bown Archive)
This collection of material has come to Wessex Archaeology through one of our Project Managers who is Fred’s great-grandson. As part of a volunteer project designed to combat isolation during the Covid-19 pandemic (funded through The National Lottery Community Fund), this archive was being catalogued, assessed and analysed by two military veterans, with guidance and support from Wessex Archaeology staff. Thanks to the work of Neart na Gaoithe Offshore Wind Limited, who are currently developing an offshore wind farm close to the wreck locations, Wessex Archaeology (who are the Retained Archaeologist for the project, ensuring that any offshore archaeological material is either protected or fully recorded) were able to assess high resolution marine geophysics of the wrecks and pass these images on to the veterans to assist with their assessment. The wrecks, having been identified early on in the Environment Impact Assessment process for the wind farm, are protected from damage by Archaeological Exclusion Zones which ensure that no vessels anchor or impact the seabed around them. Turbine locations and cable routes were sited well away from these and other archaeological assets during the pre- and post-consent design works for the wind farm.
The marine geophysics includes bathymetry data and sidescan sonar data. While neither of these techniques provides the perfect image of each wreck, by combining the advantages of both, it is possible to build up an idea of what the wrecks look like on the sea floor. Previously a 2009 survey of the wrecks only investigated two large anomalies, but it was suspected that a third segment was further away. This has been confirmed by the updated survey results.

Above: multibeam image of the K-Class submarine wrecks (Copyright Wessex Archaeology)
The wreck that is suspected to be K17 lies with bows to the south-east, standing upright on the seabed with a slight lean to starboard. As the geophysics shows the wreck itself is remarkably intact, with only some degradation of the outer non-pressurised hull. Working aft from the bow, it is clear that the front 4-pounder gun is not in place, and the conning tower has become detached. Along with the periscope this lies off on the starboard side of the wreck. The base for the anti-aircraft gun aft of this is in place, although the gun itself has gone. The two reinforced lower funnel sections for the boilers are obvious. The 4-inch gun aft of these is present, potentially split by some damage to the bulkhead between the engine and boiler rooms. There is also a suggestion that the bulkhead at the aft end of the engine room has collapsed and the stern section become partly disconnected from the engine room. All of this is backed up by dive footage from the wreck which is available on Youtube (here and here).

Above: multibeam image of K17 (Copyright Wessex Archaeology)
The wreck that is suspected to be K4 lies in two pieces with the dislocated bow section lying c. 500m to the south-west of the main piece of wreck, on the other side of K17. This shows the force of the impact from K6 that cut through the hull of K4 around 18 m from the bow and illustrates that extensive wrecking events can lead to substantial dispersion of sites across the seabed. The bow section lies on its port side with the bow to the south-west. The starboard side torpedo tubes can be seen on the sidescan image. The break is slightly further aft at the bottom of the hull compared to the top, which would be consistent with the hull shape of K6 cutting through. The main body of K4 lies with the stern to the north-east to the north of K17. The geophysics shows that similarly to K17 the lower funnels from the boiler room stand proud of the surviving hull, as does the 4-inch gun aft of them. The stern section of the hull aft of the engine room has partially disconnected at the bulkhead, as with K17, while there is a sharp break at the south-west of the wreck forward of the conning tower location where K6 hit K4.


Left: multibeam image of main piece of K4 wreck (Copyright Wessex Archaeology)
Centre: multibeam image of dislocated bow section of K4 wreck (Copyright Wessex Archaeology)
Right: sidescan image of K4 dislocated bow section, showing starboard side torpedo tubes (Copyright Wessex Archaeology)
So why did K17 sink? From the new evidence it is suggested that the combination of several areas of damage meant that there was no way to save the vessel, even with the actions of the crew in closing watertight doors. The impact from HMS Fearless initially caused a rent in the pressurised hull, but did not break the submarine beyond this rent. If that had been the only damage then it is possible that K17 would not have sunk, with watertight doors holding the flooded ward room etc. However, because the strength of the submarine’s pressurised hull had forced in the lower bow of HMS Fearless the now overhanging upper parts of the cruiser’s bow scrapped across the deck of K17, partially ripping off the conning tower and possibly the AA gun. This left the control room and beam torpedo room open to flooding. Fred Bown’s personal recollections of the sinking say that when he was in the engine room after the collision the engineering officer released pressurised air from the cylinders to blow open the aft hatch. This may have damaged the bulkheads at either end of the engine room, as well as opening the upper hatch. The funnel hatches and mushroom vents were also partially open as the submarine had been running on the surface. The combination of all of these holes meant that K17 was doomed. However, her crew had managed to escape the submarine, but due to the confusion, darkness and events unfolding around K4, they were not picked up before the destroyers escorting the battleships cut through the area.
K4 on the other hand sank as a result on one single catastrophic piece of damage. While the relatively soft bows of HMS Fearless did not totally slice through the pressurised hull of K17 (and the submarine crew had begun to close watertight doors before the impact), K4 was hit by the pointed reinforced bow of another pressurised submarine hull. As both submarines were running on the surface they were at a similar trim and so the bows of K6 sliced through K4, cutting off the forward 15-20 m of the submarine and flooding the remainder. There was no time for the crew to close any watertight doors and K4 sank extremely quickly giving none of the crew time to escape.
This work has moved beyond illustrating imagery of the wrecks. It has sought to contextualise the tragic events which led to the death of 100 submariners in the dark cold water of the Outer Forth, when no enemy vessel was within 100 miles. It has been about working with military veterans to remove the isolation caused by the Covid-19 pandemic, leading to the loss of many of their normal support networks, and also helping them to develop their researching skills. In combining these aims the project has tried to honour the memory of the early 20th century submariners while creating new opportunities for the retired service personnel of the early 21st century.
Thanks to The National Lottery Community Fund for funding the Aberlady X-Craft volunteer project which this work developed out of, to Claire Gilchrist and colleagues at NnGOWL and Fugro for their assistance with the marine geophysics data and the volunteers involved in the Aberlady X-Craft projects for their enthusiasm and keenness.
By Ben Saunders, Senior Marine Archaeologist
Watch Ben's talk on Reassessing the Battle of May Island (part of the Society of Antiquaries of Scotland's Archaeological Research in Progress Conference 2021) here.
